

I just moved into a new house, and it has a huge wall that was just calling out for a large wall hanging. Seeing that Valentine’s Day is just around the corner, I decided to create a love themed masterpiece for my wall. Wall hangings are a great way to display seasonal art and they are super easy to switch out. My wall hanging is hung with two command hooks, a curtain rod, and curtain rings with clips. No need to worry about making a rod pocket!
The inspiration for this wall hanging came from a pinterest post that, unfortunately, I cannot locate! It had the same general idea, but I added an extra border around the middle square. The post came with no directions,so I drew up my own plan and measurements. My squares are 4 x 4 inches finished, if that helps with dimensions and proportion.
I started with the square and added the borders around it. Once that was complete, I designed and sewed on the birds and lettering. Since I machine stitched them on, it was much easier to do it as a square form instead of the whole piece, since twisting and turning all that fabric around isn’t very fun.

After I drew my letters, birds, and hearts, I placed them on the square to see exactly how I wanted them to go. The next step was to take a sewable fusible backing and iron it onto my material for those shapes. I traced the shapes onto the backing and cut them out. The backing actually gives the fabric some more stability, so it is easier to cut out, and it keeps the fabric from fraying over time.
Once the backing was on the material and it was cut out, I pinned my items onto the square and machine stitched them in place in a light pink thread color.


After that was complete, and my ribbon was sewn into place, I hand stitched the feet, beaks, and eyes onto the birds in a bright pink color thread.
After that, I sewed my rows of 4 x 4 squares together (they were cut 4.5 by 4.5 to allow for seam allowance) and added them and my white 6 inch strip of fabric to the wall hanging. I attached the hearts along the bottom in the same way- I ironed on fusible backing, cut them out, then machine sewed them onto the wall hanging.
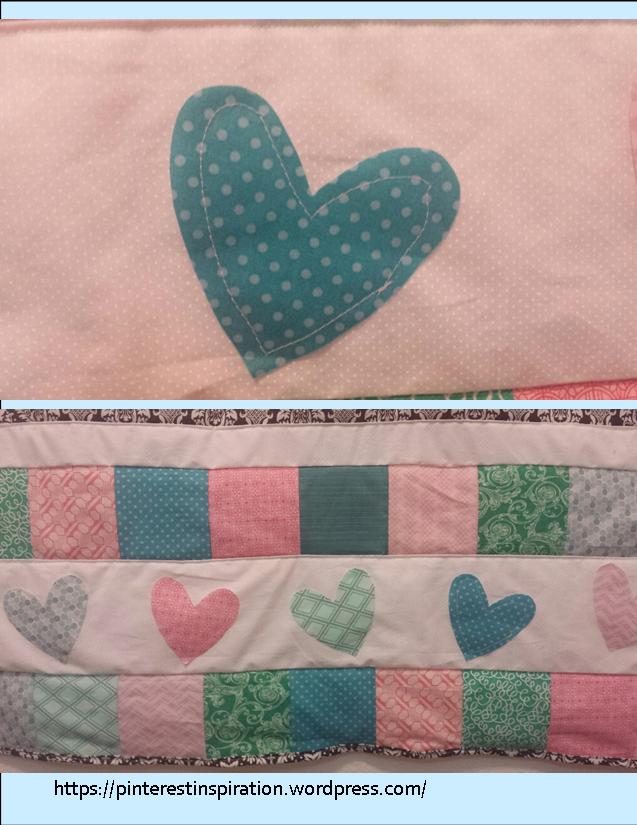
Once the wall hanging top was complete, I added a low loft batting and part of a plain sheet for the back. (Often I can find sheets in my local thrift store for way cheaper than I could buy fabric) I machine quilted around the hearts, birds, and letters. I also machine quilted along the edges of my borders. Since I don’t plan on washing this, I don’t have to be too concerned about the distance between quilting rows, but it’s a good idea to look at the package your batting comes in and see what it says. Mine said I should quilt at least every 6 inches. This prevents the batting from balling up inside the wall hanging if you do wash it.
I will admit that machine quilting this was not easy- those hearts were difficult! If you look closely at it, I certainly didn’t do a perfect job around them, but that’s what gives handmade items their character!
I made my binding out of two inch strips of the same brown material that is in the square border of the wall hanging. Binding is super easy to make and you don’t need a whole lot of it to complete a wall hanging like this. A general rule that I use with binding is to make more than you think you will need- you’d be surprised at how much it takes, and I’d rather have extra than run out!
Happy Valentines Day!
**Originally posted on pinterestinspiration, this was reposted to Mossy Elm. The photos are my own.


One comment on “Love Birds Wall Hanging”