

I learned how to make these paper hearts and chains at a family craft night at my local library. They are super cute and a great way to use up old magazines. I chose to make my heart ornaments from extra old pages from a book that I had repurposed into a smashbook. Magazines with pictures are prettier than those with a lot of text, but I did find a couple of word collages that looked pretty cool too.
The materials for both of these projects is simple: scissors, magazine or book pages, and a stapler. You might also want to use ribbon or string for your heart ornament.
For either project, you will need to cut your paper into strips about 1 inch in width. I folded my magazine page in half, then in half two more times to make 8 strips- then I cut on the folded lines.

FOR THE HEART CHAIN
You will need two strips to make each heart. Start by bending one strip in half and meeting the ends together. Do the same for the other strip, and put them side by side so that all four ends are together. Staple your ends with one staple. (Check out the picture below)

Once your first heart is stapled together, make another out of two more strips, but DON’T staple the ends yet.
Place the ends of your second heart between the loops of your first heart, then staple them both together. If you look at the picture below, you will staple where my fingers are.

Keep adding to your chain until the desired length is established. I used safety pins to pin mine to my curtains.


MAKING THE HEART ORNAMENT
This is a super neat craft that seems complicated at first, but once you make your first one it’s a breeze! I’ll demonstrate with magazine pages, but you can use any type of paper that you wish.
Start out by cutting equal strips of paper about 1 inch in width. You will need 8 strips. The smaller your pages are the smaller width you will want to go. Just keep in mind that the smaller you make it, the harder it will be to put together.
Once you have your 8 strips cut, you will need to cut them into 4 different lengths (2 of each length- see picture below for reference)
Once your strips are cut into lengths, you will need to order them in the pattern shown below. This is how you will stack your strips of paper. If you are including a ribbon or string, that will go in the middle of your pile. Once your papers are laid out in order, stack them up. Your papers should go from short to long and back to short. The long strips in the middle and the short strips on top and bottom. If you have a ribbon or string, it will go between your two long pieces. Once they are stacked, make sure the ends are flush and staple them together.
*TIP- If you have a side of your paper that you would like to be more visible, make sure that side faces towards the middle of the stack.*

The photo above shows how to position your string or ribbon in the middle of the stack. Below shows the stack complete, with short strips on top and bottom. One side has all the ends flush.
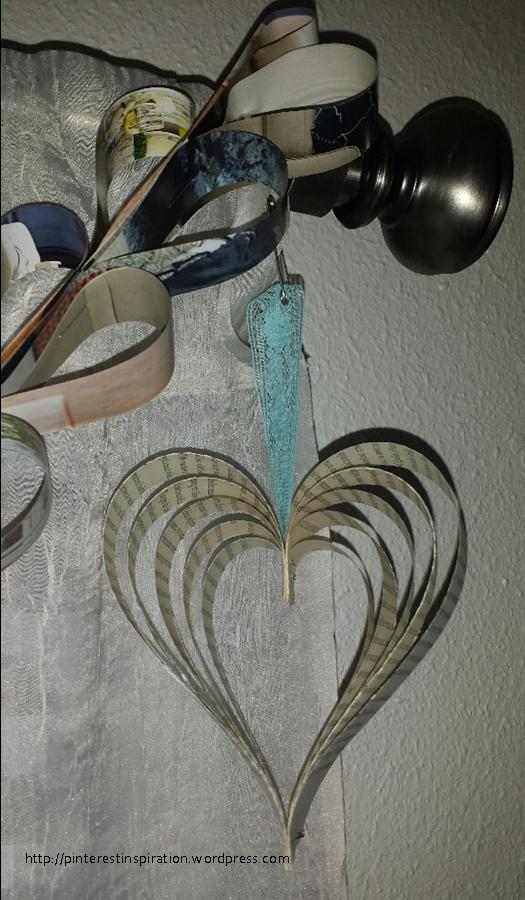
Once your flush ends are stapled, the fun begins! Begin peeling your strips like a banana and holding the ends flush. Once all the layers are peeled and the ends are flush, staple!

After stapling the ends, you may decide that you want to trim some of the tip of your heart and restaple the layers together a little shorter. That’s normal, especially if you used magazine paper or paper that is long.
Once you’ve completed your first heart ornament, you might want to experiment with different papers or a different number of layers. Have fun with it!
**Originally posted on pinterestinspiration, this was reposted on Mossy Elm. The images are my own.


One comment on “Paper Chain Hearts and Layered Heart Ornament”