

I have to admit, the idea for these super cute ornaments was not my own. I saw a pin from an Esty site of ones similar to what are pictured, and since there were no directions on how to make your own I decided to go for it! The pin that gave me this idea can be found here.
Although simple and fairly straightforward, these were time-consuming! I’ve included close-ups of each one, and some tips that I learned along the way!
Items Needed:
Hot glue gun with glue (I only needed one stick)
A couple of old magazines
Scissors
CHRISTMAS TREE
This was the first one I attempted. I started by ripping out and straightening edges of a bunch of magazine pages. Note that the content matter of the page doesn’t matter, but the main colors will stand out. It’s good to keep the colors in mind when choosing your pages.
For the tree, I folded the magazine page in half vertically (long ways) then continued to fold it until I had approximately a 1/4 inch strip of folded paper. I then manipulated the paper into circles, hot gluing the end to the outside of the circle, then hot gluing the beginning of the next strip right beside it. Continue until your circle reaches the desired size. (I believe my big circle is 4 pieces of paper)
*After the tree, I decided to cut the magazine pages in half vertically, then folded them in a similar fashion as I described above. It made the strips skinnier and a bit easier to work with.*
Once my circles were complete, I fashioned the tear-drop pieces, then the trunk. I hot glued them all together.
Once the interior pieces were attached, I finished it with the outside edge. This is where you may want to pay a bit more attention to what is on the outer edge of your strips of magazine paper, as it will be visible.
I had to use 3 different strips of paper to complete the outside edge, so I decided to sandwich the strips together, placing the new strip in the middle of the old one. This made it a bit more seamless. (See the picture below)


I found that it’s best to end a strip and start a new one when the paper is naturally bending or at an angle, as it doesn’t look as obvious in that place.
Below is a look at the tree next to a magazine, so you can get an idea of it’s size.

And here’s the finished product up close!

SNOWMAN
The snowman was my second project and was probably the easiest of the three to accomplish.
For this one, I was a little more picky about the colors on the pages that I chose. Obviously a bit of color is okay, but I chose pages that were primarily white for the body and primarily black for the hat. I only used 4 or 5 pages for the hat, but I really had to scour my magazines for the black backgrounds. (Note that for my white body, I chose some pinkish paper in a couple areas to give it some color. Be creative!)
The bodies are just two circles, one larger than the other. Once the circles were complete and glued together, I put a strip around both of them.
For the hat, I actually started with a circle, then merged the circle into a square. I glued that onto the brim, then wrapped a strip around both the brim and the square.

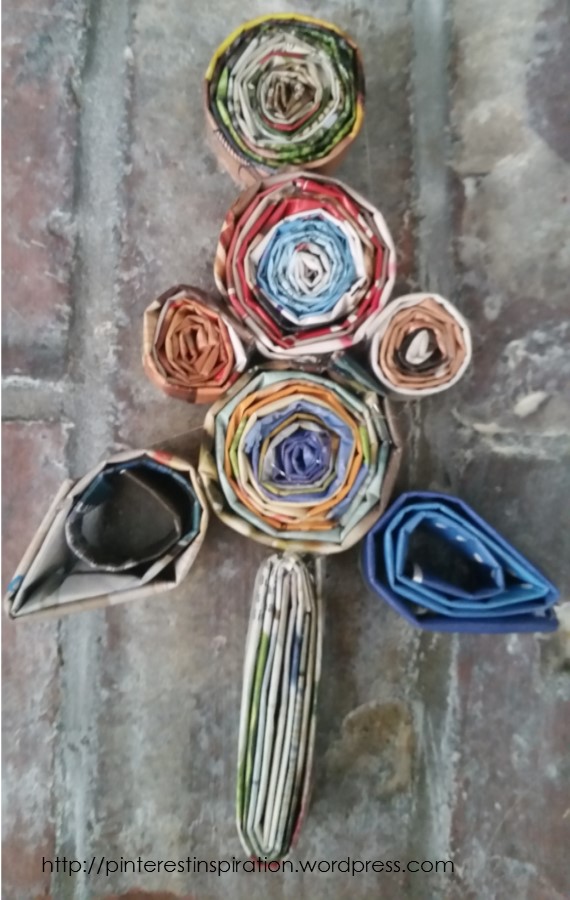
ANGEL
The angel was the last project that I did, and by this time I was getting a little weary! It is probably the hardest of the three to do.
For the body, I made two circles, one slightly larger than the other. I glued them together, then made a bell shape around them, gluing where needed.
The wings and head are tear-drop shapes. Make the wings larger than the head. Once they’re complete, glue them on!

Glue a ribbon or twine on the back of them to hang them. They would also make great package decorations hooked onto a gift bag or present. Enjoy!!


One comment on “Recycled Magazine Ornaments”